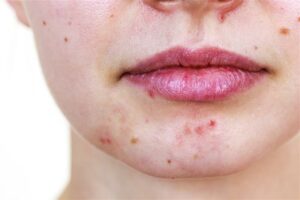
So, you decided to get that bothersome “skin thing” checked out, but now what?
After you fill out your patient details and medical history you will be asked to upload up to three images of your skin concern.
What camera should you use?
Your smartphone will do! Simply open your camera app and select the photo option, aim the camera at your area of concern, and press the button to capture your image. You can also use professional cameras, but it is not a requirement.
One trick is to use a 3 second timer to take the picture. That will prevent you from shaking the camera as you take the picture and helps to keep the image in focus.
Sometimes you might need someone to help take the pictures, especially if your skin concerns are on your back, or in a tough-to-reach spot.

What type of pictures are expected?
For the best results, we ask that you take three pictures.
Image 1: Point your camera lens toward the area of your skin concern, about 35 centimeters away, directly above the area in a way that also captures the body part it is on.
Most importantly, make sure the picture is in focus.
Image 2: Move your camera a bit tighter so that you can get a close-up. Re-focus the lense (if necessary) by tapping your phone screen right before you take the picture (and using the “3 second timer” trick).
Image 3: Have a coin ready and place it next to your skin concern. This is to help doctors get an idea as to the size of your skin concern.
Remember to keep the images as clear and in-focus as possible so that our doctors can provide you with the best advice possible.
Uploading your pictures
The hardest part is over!
You now need to upload your photos to the GetSkinHelp platform. There are several ways to do this, and it depends on what camera you use.
If you use your smartphone camera, you have two options:
Option #1 (Using your phone) – Go to the GetSkinHelp website through your mobile device. Follow the instructions, which include submitting your medical history, and upload the images when you are prompted.
Option #2 (using a desktop computer) – You can either email yourself your pictures or connect your smartphone through its respective USB cable and transfer the photos onto your computer. Once the images have successfully been transferred go to our GetSkinHelp website and begin the process.
NOTE: If you used a digital/professional camera, you could upload your images by either connecting your camera using its respective USB cable or inserting its memory card to your computer. Once they have been uploaded to your computer you can drop the images into the GetSkinHelp platform.
Congratulations! You are now one step closer to booking an appointment with one of our dermatologists.
If you have any questions, visit our FAQ page.
You can also contact us at info@getskinhelp.com or by calling 1-833-272-7546 (SKIN) if you have any other concerns.


